Oltman's NBP

Welcome to Oltman’s Next Big Project! Or as my wife calls it: another excuse for Oltman to occupy a full table in the house.

I have been a big fan of the Guitar Hero games, and still have my Xplorer guitar from the XBOX version of Guitar Hero 2. Because it is USB I can use it with any PC based rhythm games, like the few below:

GH:WT Definitive Edition (https://ghwt.de/)
YARG - Yet Another Rhythm Game (https://yarg.in/)
Clone Hero (https://clonehero.net/)

But I have so many other peripherals that I cannot use because the proprietary XBOX 360 wireless and they just feel like a waste.

So I had 2 projects this holiday:

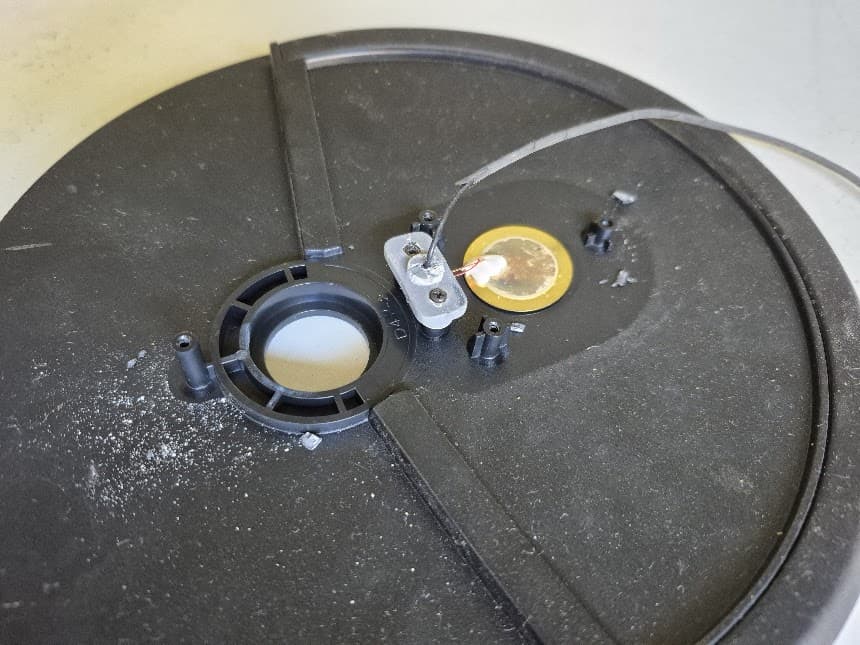
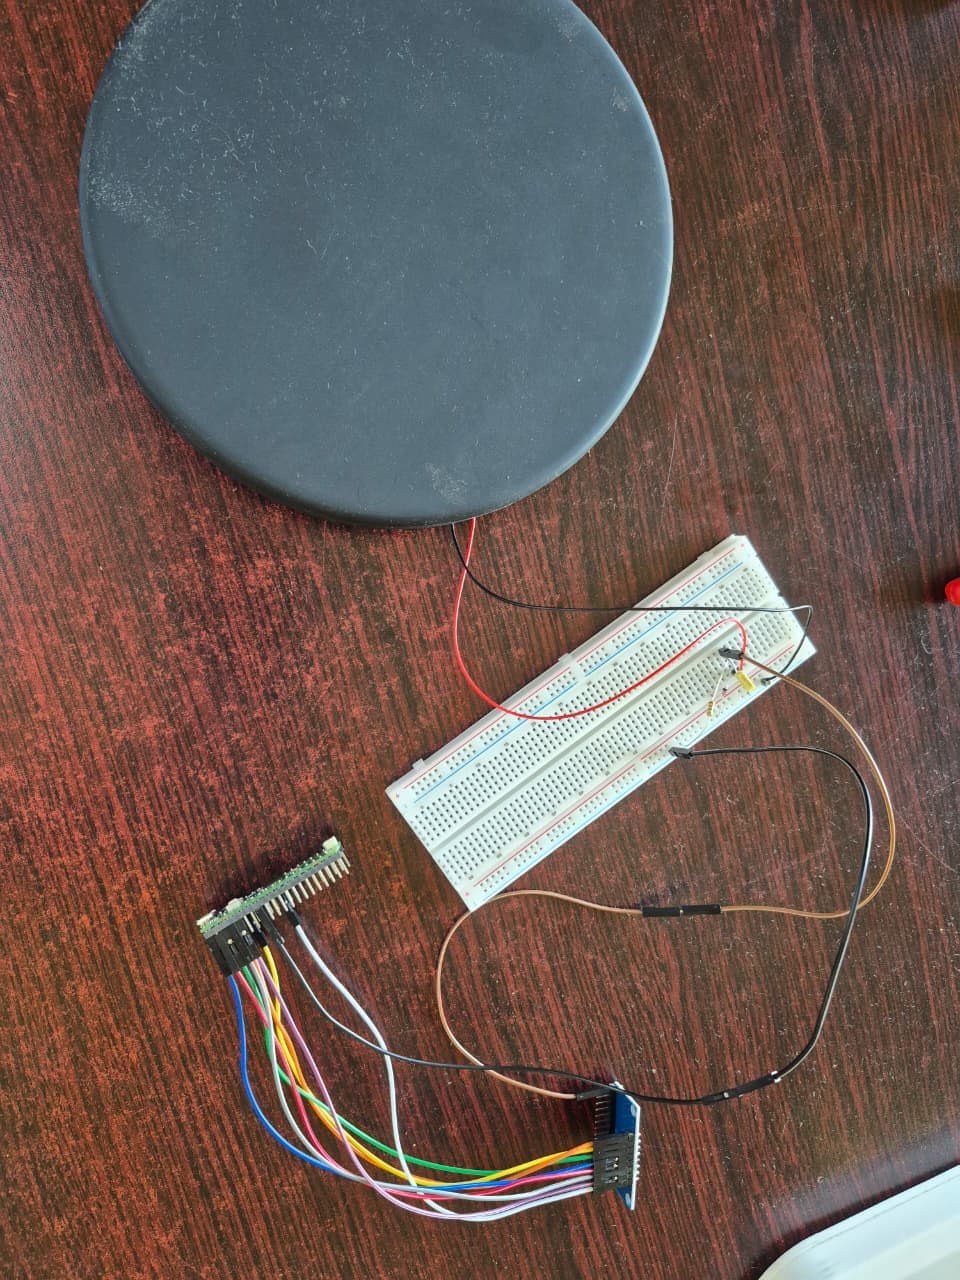
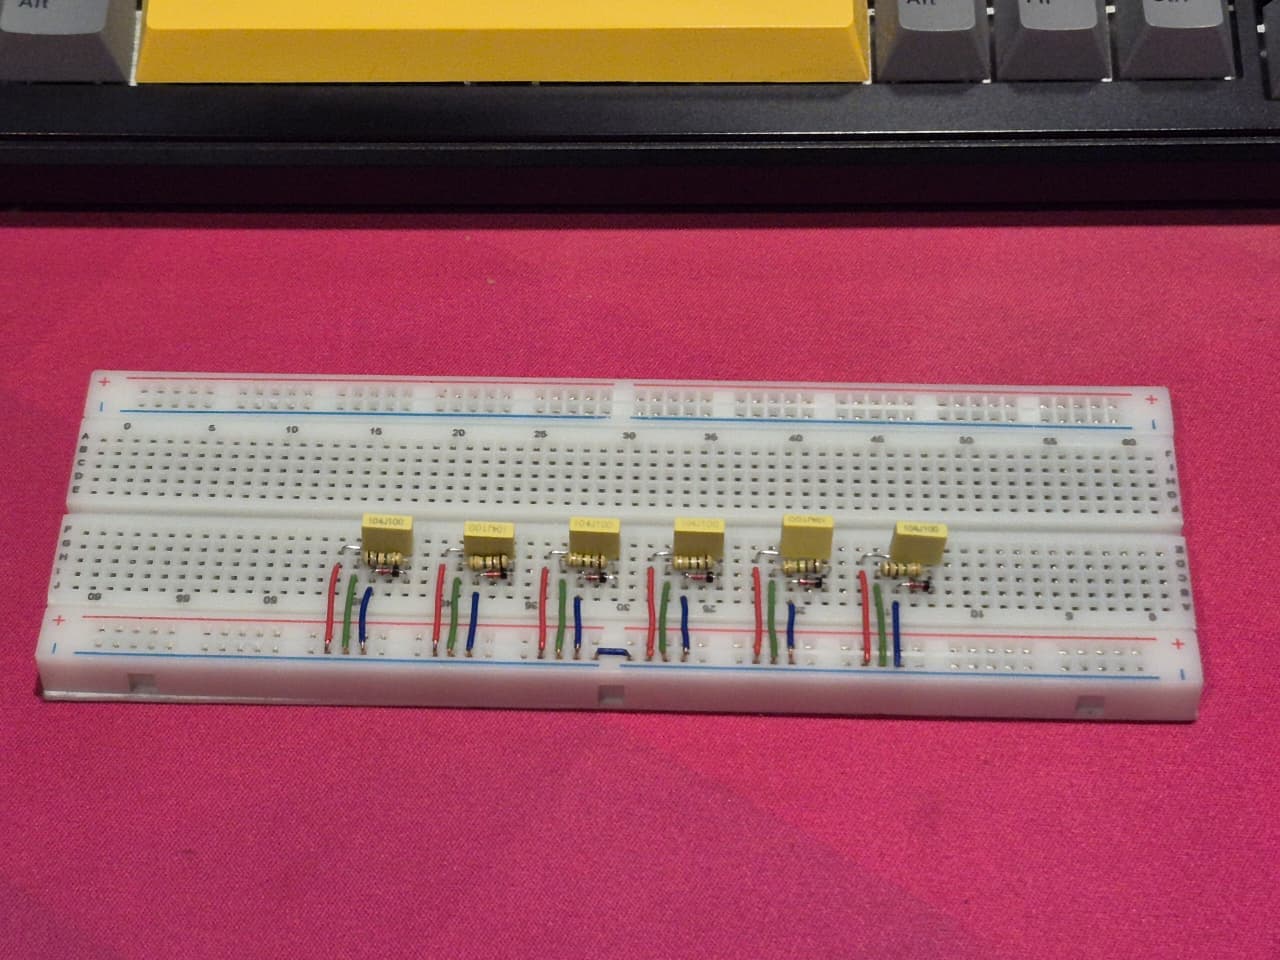
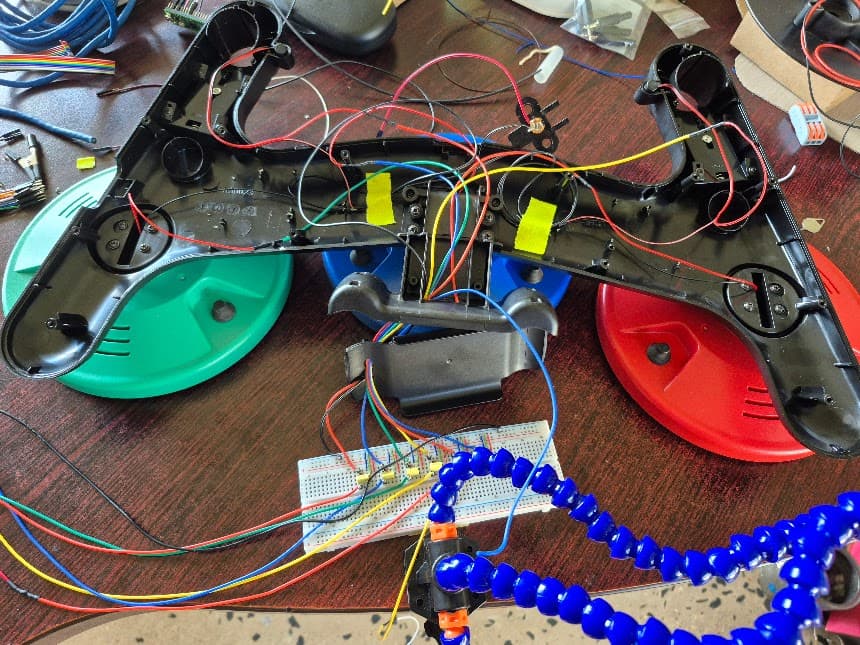
  1. Revive an old GH guitar to make it USB
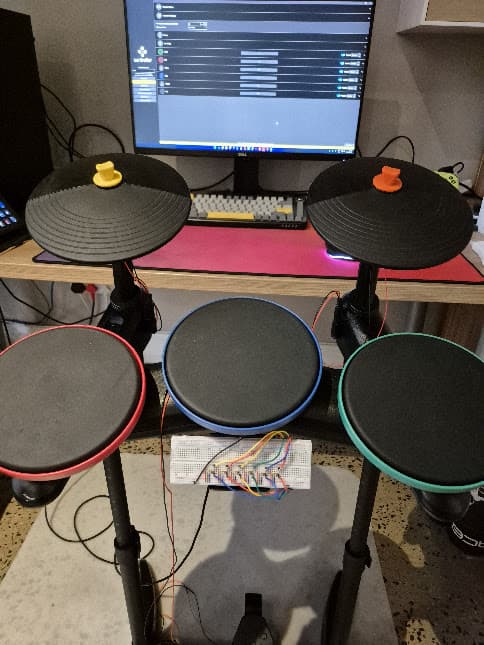
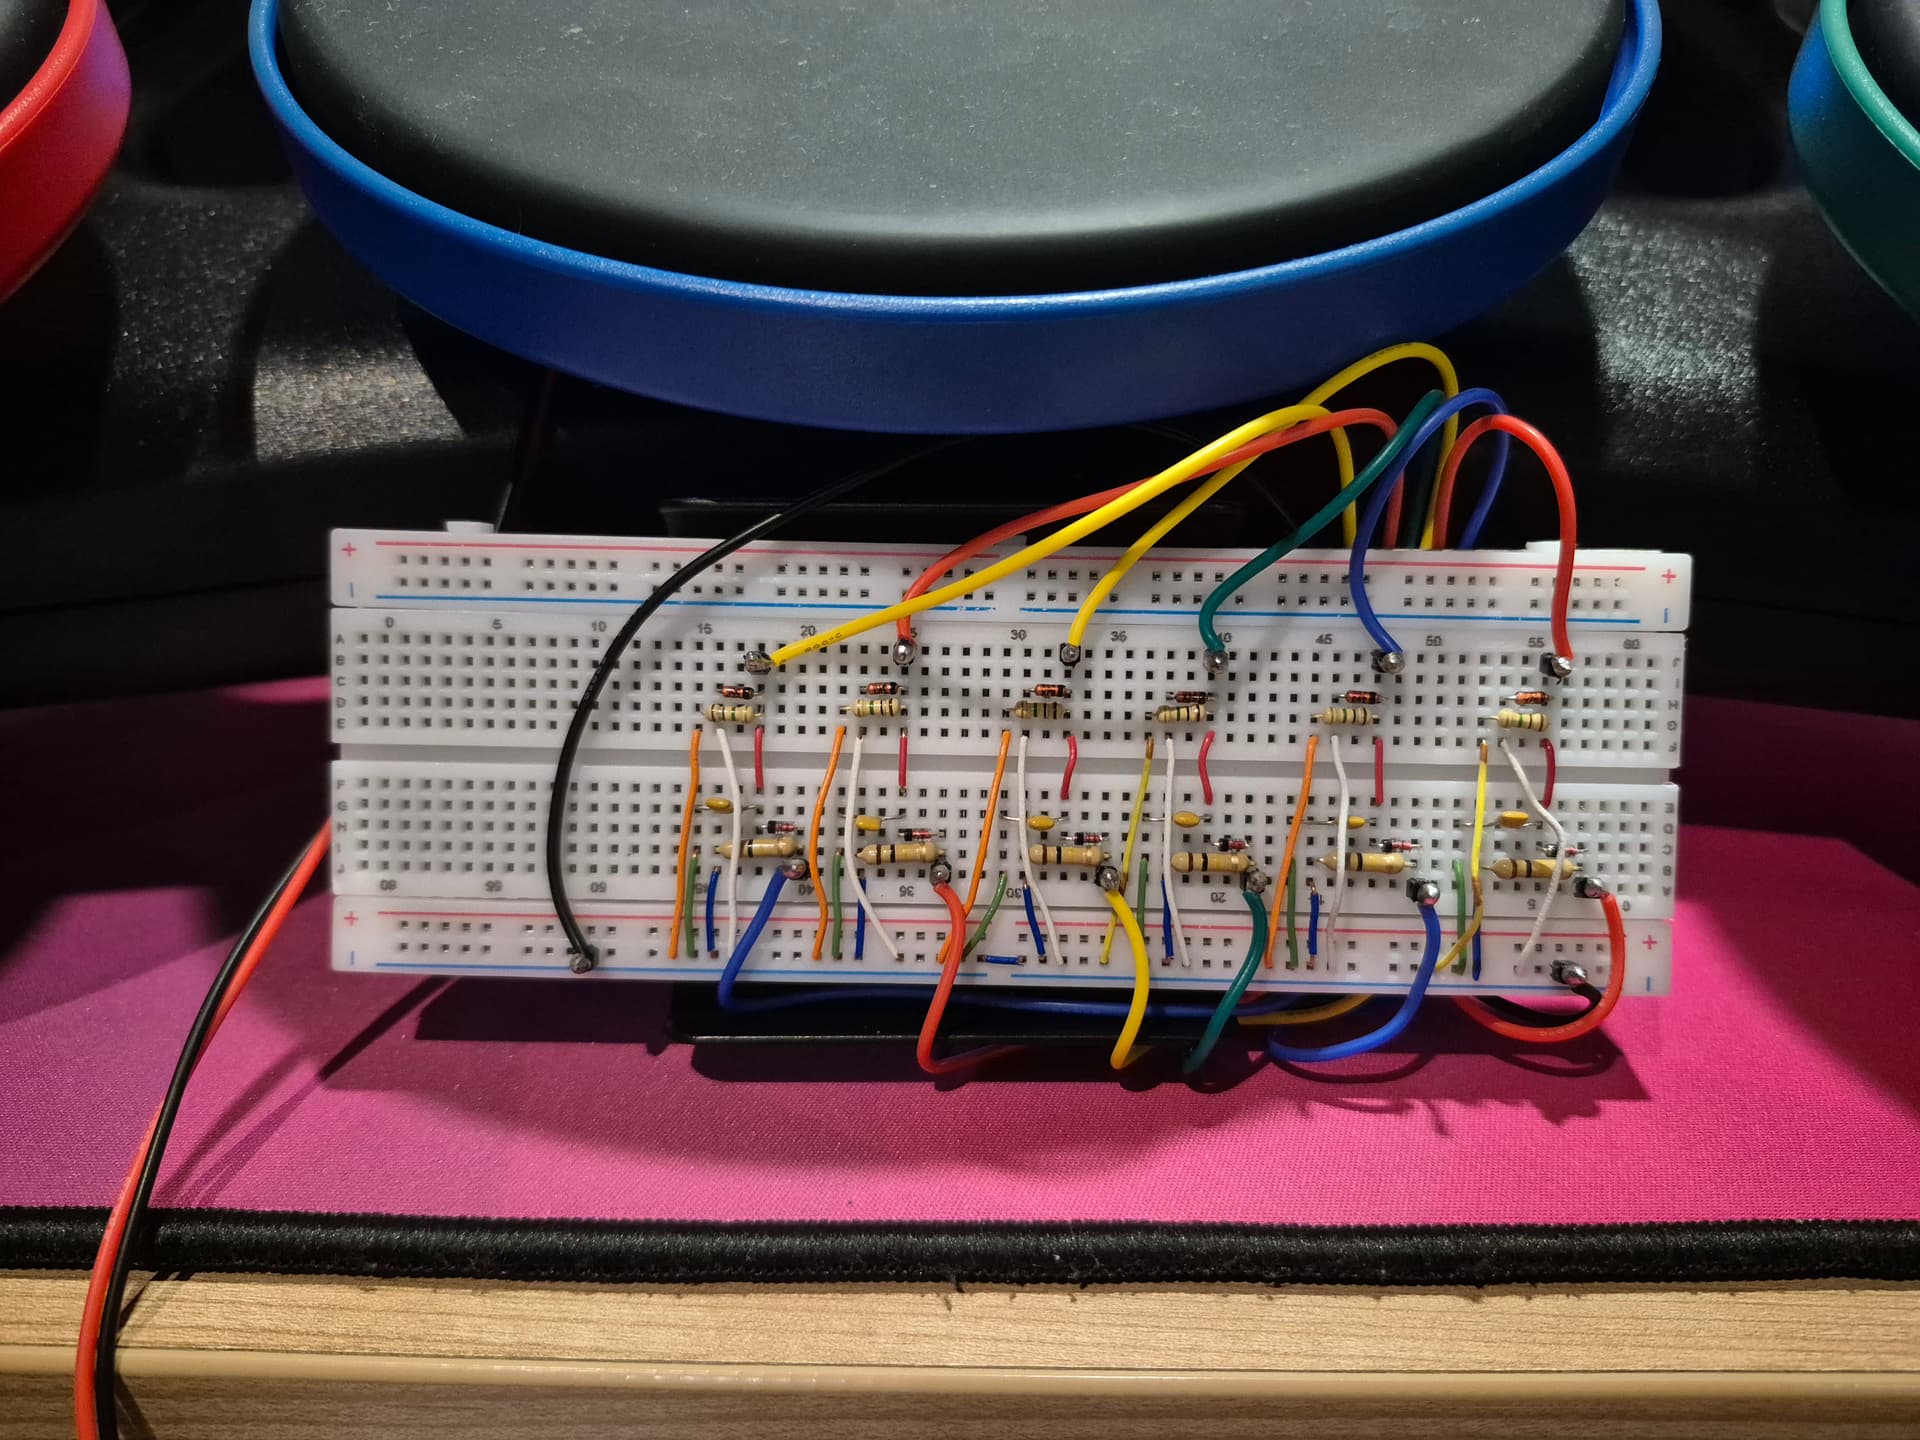
  2. Revive an old GH drum set and make it USB

1. The Guitar

I spent lots of time researching and found quite a few revival kits, some even being “zero solder” which sounded great. The kit I settled on after a lot of back and forth was Kojack Customs on Etsy. I received the kit like a day before we closed for Christmas and it was not nearly as easy as they made it out to be.

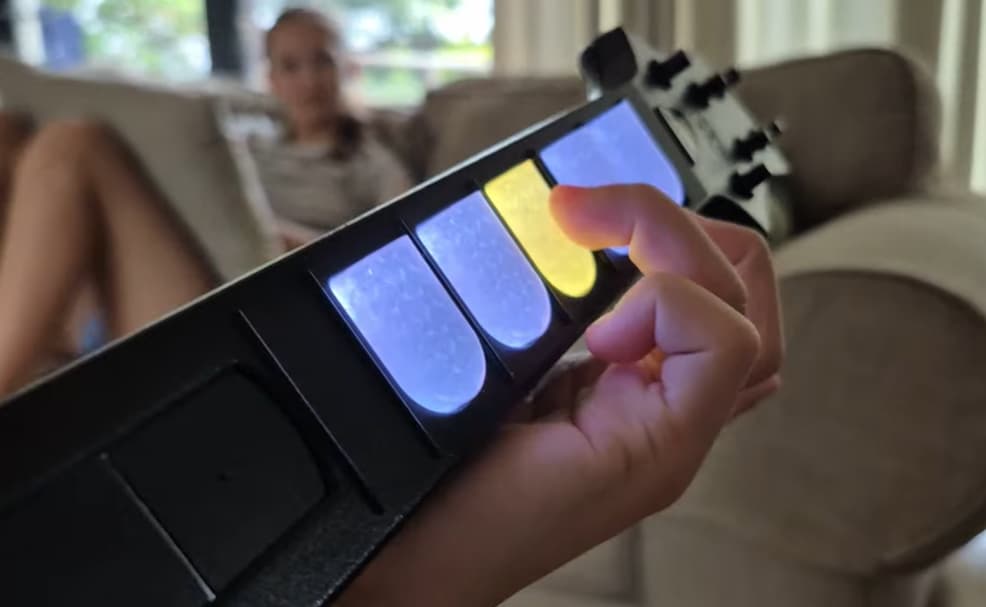
Essentially, what most of these kits do, is have a custom PCB with a Raspberry Pi Pico controller chip on, and then use this to translate the inputs from the guitar buttons to USB so you can use it in the games above. The kit I bought also replaced the fret board with mechanical keys, and RGB lights as well because well why not?? :smiley:

It took a while but I managed to get it all working!

In my research I discovered that they all use the Pico as controller, so I figured there must be a drum revival kit as well, but nope. No kit. So I eventually came across a credit in one of these kits being given to Sanjay and found his site:

This software is being used by most of these kits to program their boards. And he has a drum section!

Next step: make my drums USB! Easy!

4 Likes

2. The Drums

I have 2 drum sets, one was a purchase with Guitar Hero 5. The other is an old Band Hero drum set that I saved before friends were dumping it.

I stripped everything, cleaned it and tried to figure out what I would need.

The biggest problem was the rubber perished on all the cables.

I did not want to chance it and decided to redo as much of the electronics as I could.

In my mind I would hit a pad, and then the Pico will detect a hit, and then tell the game I made the right hit at the right time… LOL! How naive!

So, this is how a drum pad works, and what I needed to learn:

  • you hit the drum with a stick
  • a piezo sensor vibrates and these vibrations send voltage spikes to the controller
  • these spikes can reach up to 40 or 50 volts, while the Pico is limited to 3.3V
  • so I need a 1M Ohm resistor, a diode to stop the negative volts (the piezo vibrates up and down and thus creates negative volts???), and a capacitor to try and keep the volt spike a little smoother so the controller has time to pick up on it.
  • the Pico only has 3 analogue pins, so I decided to get a multiplexer so i can have up to 16 inputs as analogue and turn my drum kit into a MIDI drum set! You know, because I am now going to become a real drummer…

I now realised I was maybe biting off more than I can chew but accepted the challenge.

I consulted smarter friends than me, and read up on reddit, used AI, and then used a different AI to see it they agree. I took the plunge and ordered the parts. This is when I discovered Santroller also has a DRUM section.

Not being very electronics savvy, it took me a very long time to get just ONE drum pad to work, but I did it. (Keep in mind this was with in-laws visiting and general holiday stuff going on…)

Next I had to copy and paste that layout for the other 5 pads / pedal. I was very proud of this step:

The IT guy in me made sure to test everything before proceeded and they all worked first try!

Next up was to test all the pads and this too was a success. I was getting cocky… I did not, however, test them ALL AT ONCE… (foreboding)

I proceeded to fit everything back into the old drum case.

Many, MANY hours later and I got everything closed up, and ready to test!

I noticed the following:

  • I wired the drums in the wrong order on the multiplexer. Not a problem, I fixed it in software.
  • I there is quite a bit of noise on the piezo inputs. They range from 0 - 65000 but constantly hover around the 600 - 800 mark. My first testing had the noise level at less than the 100 mark. (I dont know what unit of measurement this is…)
  • the vibrations in the kit transfer a lot from one pad to the other. If I hit the green pad the blue and red will also register hits, but with enough adjustment in the app I could make them all work pretty well, actually.
  • I noticed the foot pedal would pick up a lot of vibrations as well, but thats when I realised it was not even plugged in yet…

Part 3 will explain my current problem and my lack of knowledge on how to fix it…

3 Likes

3. The problem

So, apparently what is happening is that the voltage spikes from a hard drum hit, creates enough of a current that there is crosstalk from the pin the current comes into, and the adjacent pins pick up the interference. Plus the kick pedal has the longest wire in the system and this can act as an antenna and pick up the interference even better.

I have done lots of research and there are a few fixes, most of which I cannot test and have not proof that it will actually work.

I could add different diodes, as specified 3.3V Zener Diodes (like they actually suggest on santroller).
I can try to ground the kicker piezo directly into the Pico into its own ground pin, and NOT into the multiplexer.
I should stop daisy chaining the other piezos’ ground and do a “star” config. Not sure ho you do this when you use a breadboard…
I could twist the kick pedal wire like a lan cable twisted pair to make it less susceptible to noise pickups.

I want to create a custom PCB eventually, but no ways am I doing that until these little gremlins are ironed out.

Does anybody have any idea how this stuff works that can help out with ideas?

2 Likes

Yeah no, I’m clueless when it comes to things like this. Hopefully there is someone who can offer advice

3 Likes

Its the thought that counts :wink:

1 Like

I know this is for a Teensy, but the basics should still be the same… Get ready to geek out over electronics…

4 Likes

This is awesome :slight_smile: I guess insulation isn’t going to make any difference, hey?

I’m going to watch the video when i have time next week, maybe I’ll think of something, but sounds like you’ve explored all the options I’d be able to find already.

3 Likes

Made some progress last night by following the video and I seem to have made real progress with the crosstalk.

Problem now is the kick pedal does not work at all. It was too late to troubleshoot and will try again later.

This is the current layout, not tidied up yet.

4 Likes

it’s not a proper project if fixing one thing doesn’t break something else :slight_smile:

3 Likes

Right, all sensors working properly, no more crosstalk, no ghost hits, everything seems just peachy in Santroller software. So I saved the config, updated the ROM, and it still looks good!

Next I try to launch YARG to test it out, but the red button / sensor is permanently activating, which is also the BACK button. But I cannot get to the settings screen to disable it as the BACK button keeps activating…

Turns out YARG somehow overrules the sensitivity setting in Santroller. Now I have to figure that part out… This is no longer as much fun as it was in the beginning.

Oh, and another problem I found is that the lounge PC where I would imagine we play most, only polls the controller at something silly like 10Hz. My main PC polls at 1000Hz. Something to do with AMD and how it’s USB controller manages the polling rate or something. More research needed there too.

3 Likes

Ah the true form of the DIY project

3 Likes